Setting Up VerteLith with Printer and Cutter Workflows
This guide walks you through the complete workflow for setting up a printer and cutter in VerteLith, linking them, and running a job that includes cut contours.
Step-by-Step Workflow
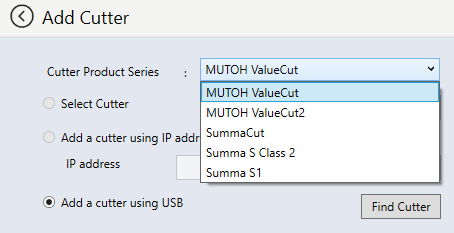
- Add Devices in VerteLith
- Add your printer and create a corresponding PrintEnvironment.
- Add your cutter and create a CutEnvironment.
- Configure CutEnvironment
- Inside the CutEnvironment settings, specify the path to your cutting software (e.g., “Summa Cutter Control”).
- Inside the CutEnvironment settings, specify the path to your cutting software (e.g., “Summa Cutter Control”).
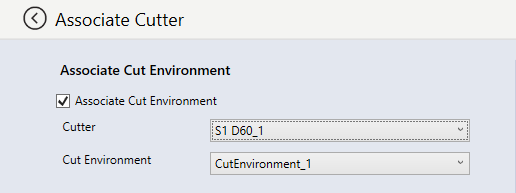
- Link CutEnvironment to PrintEnvironment
- Go to Manage > PrintEnvironment.
- Edit your PrintEnvironment and click Next until you reach the screen where you can link the CutEnvironment.
- Select the correct CutEnvironment and click Save.
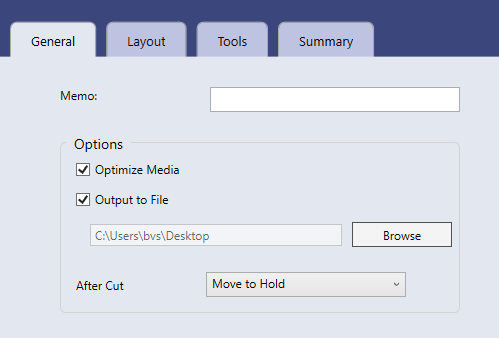
- Prepare and Send the Job
- Import a job that contains cut contours (CutContour).
- In the job settings, enable:
Crop Marks > Enable crop marks for cutters.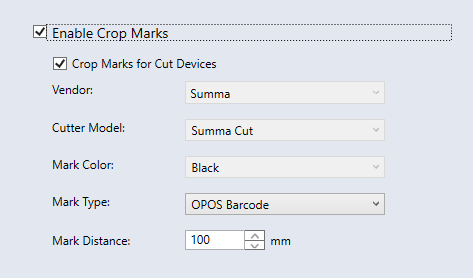
- Send Job to Printer and Cutter
- Send the job to the printer.
- A cut job will automatically be generated in the specified folder for your cutting software.
- Open your cutting software (e.g., Summa Cutter Control) to begin cutting.
? Additional Resource
Mutoh America offers a similar explanation (without environment setup):
How do I print a barcode on each cut page of a job?
Was this article helpful?
That’s Great!
Thank you for your feedback
Sorry! We couldn't be helpful
Thank you for your feedback
Feedback sent
We appreciate your effort and will try to fix the article